
Compiling Sh on Windows with Visual Studio
This guide walks you through building Sh on a Windows machine using Visual Studio .NET or a newer release. Before you begin, collect every zip archive listed on the download page.
Build Sh first
- Extract libsh-VERSION.zip into your working directory.
- Extract libsh-VERSION-win32deps.zip into the same working directory.
- Open the solution file libsh-VERSION/win32/Sh.sln, then press F7 to build the solution.
Grab the required archives from the download page.
Building Shrike afterwards
Once Sh is built as described above, continue with Shrike by following these steps:
- Extract shmedia-VERSION.zip into your working directory.
- Extract shrike-VERSION.zip into your working directory.
- Extract shrike-VERSION-win32deps.zip into your working directory.
- Open the solution file shrike-VERSION/win32/shrike.sln, then press F7 to build the solution.
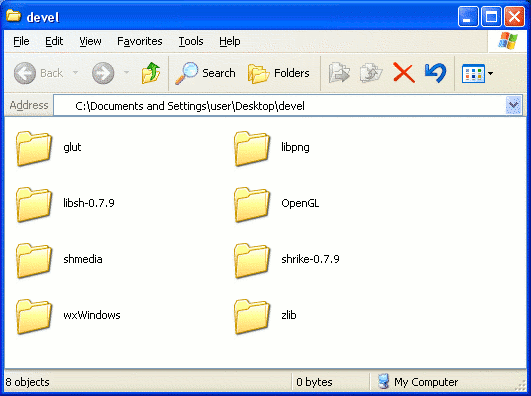
If Shrike shaders that rely on a texture fail to run, check that your working directory is set to "Debug" or "Release" in the Visual Studio project options, so relative paths resolve correctly. After unzipping everything, your working folder should contain the subfolders shown below.
Commonly reported build problems
These tips come from issues reported by users and help you get Sh programs building successfully on Windows.
Enable RTTI when compiling
Sh depends on RTTI, so it must be turned on in any project that uses it. In MSVC, go to Project properties, then C/C++, then Language, and enable Run-Time Type Info.
Explore the wiki
Learn more about Sh and Shrike, or read the original Building Sh on Windows article.
- Main Page
- Recent changes
- Random page
- What links here
- Related changes
- Upload file
- Special pages
- Printable version
About this page
Source: Building Sh on Windows. This page was last modified on 16:09, 28 March 2006 and has been accessed 16,279 times.
